Junior-Level C# Coding Prerequisites - What You Need!
Learning to code can feel exciting and a little overwhelming at first. This C# tutorial for beginners is designed to guide junior secondary school learners and kids through their very first steps in programming. By the end of this guide, you'll know how to set up Visual Studio for C#, create a simple project, and run your first program.
Before writing code, you'll need a development environment. The best option for students is Visual Studio Community Edition, which is free to download. Before you begin coding in C# as a beginner or junior secondary student, it's important to understand how Visual Studio works. This beginner C# tutorial will guide you through setting up your development environment.
Steps to install Visual Studio:
- Visit the official Visual Studio website.
- Download the Community Edition.
- Install and select the C# development workload.
This setup ensures that junior secondary students learning C# basics have everything they need to start coding.
How to Set Up Visual Studio for C# for Junior Secondary Students
Setting up Visual Studio for your first C# project is simple. Follow these steps to complete your C# console application setup, which is the ideal starting environment for any beginner C# programming for junior secondary school student.
Creating a New C# Project
If you are a beginner or junior secondary student, creating a new project on Visual Studio is simple:
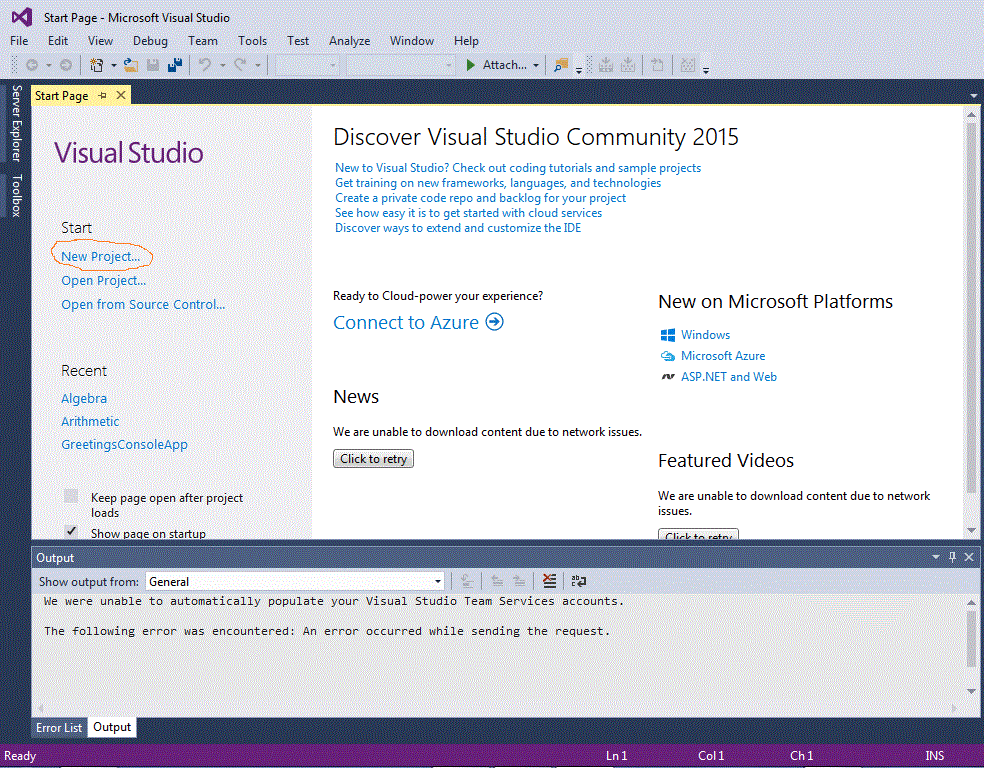
- On the Start Page of Visual Studio, click New Project.
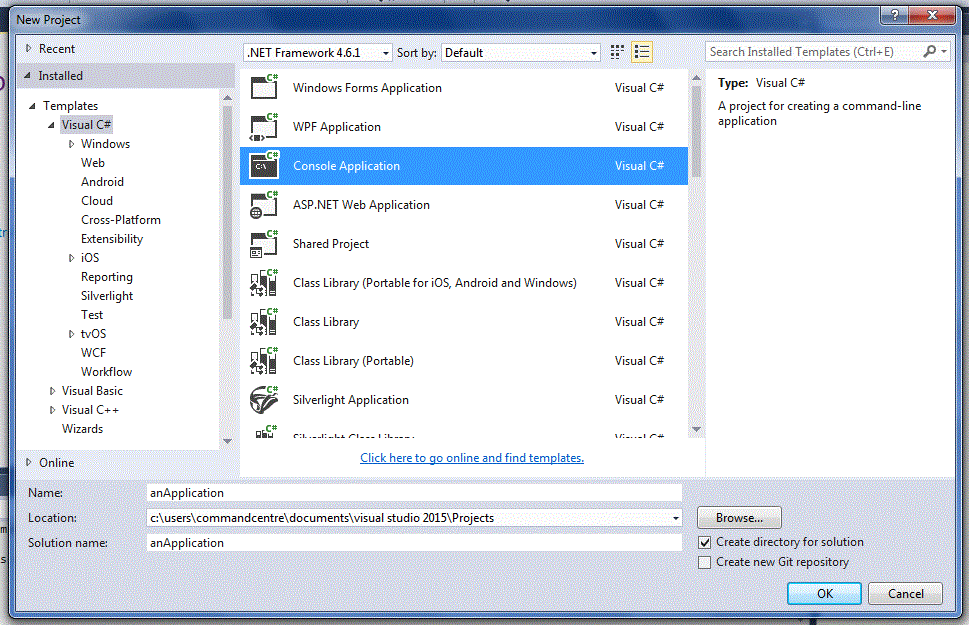
- Select Visual C# and choose the Console Application option under the .Net Framework.
- Give your project a memorable name, then click OK.
Adding a Class File
If you are a beginner or junior secondary student, creating a class file is straightforward:
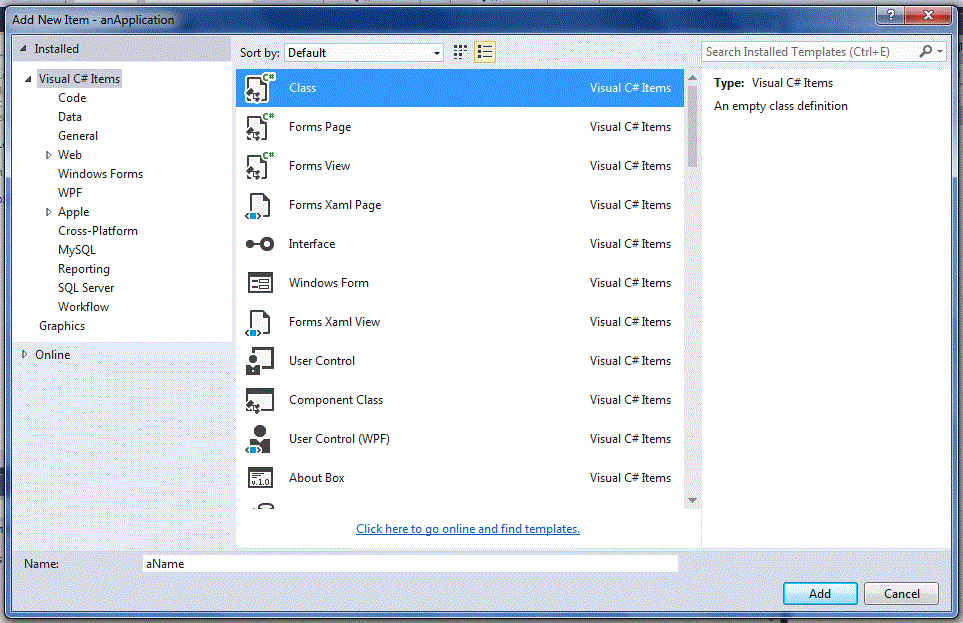
- Click Project, then Add Class.
- Select Class, give your new file a name, and click Add.
Running C# Codes for Junior Secondary Students
Once your project is set up, you will want to see your code in action! For the beginners or junior secondary students, you have to first make sure your C# code contains no errors. You may also want to see your C# code's output before you get to building it.
To see your C# code's output, set a breakpoint at the closing brace(}) of the static void Main(string[] args)
statement in the main class:
Click on the left area of the } line to highlight it;
click Debug at the top of the window, Toggle breakpoint;
a red dot appears on the } line.
Press F5, (click Yes) to see the project run to completion;
or just click the Start button at the top.
Alternatively, click Debug >> Start Without Debugging (Ctrl F5) to see your C# code output.
Notice: Our C# colour coding follows that of Microsoft's Visual Studio.
Introductory C# Tutorial for Junior Secondary Students
For a beginner-friendly C# tutorial for kids and junior secondary students, summarised to only the key facts to help young learners
comprehend the C# language and get started with utilising C# for coding, check our
A beginner's Tutorial and Guide to the C# Programming Language
from the Junior Secondary Category.
Visual Studio Start Page

Visual Studio New Project

Visual Studio New Class

